In this guide, we are using periph.io, a library for
peripheral I/O in Go, to set one of the Raspberry Pi’s General Purpose I/O
(GPIO) pins to a logical high (3.3V) or low (0V) signal.
periph.io supports the Raspberry Pi 3, Raspberry Pi Zero 2W and Raspberry Pi 4, starting with version
v3.6.4.
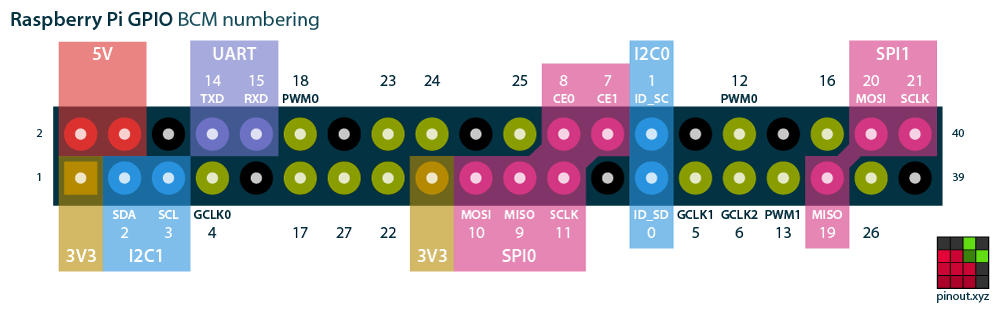
Connect GPIO pins based on pinout
To verify the code is doing what we expect, let’s connect a multimeter as per
pinout.xyz’s pinout:
pin number 18 (signal BCM24, labeled 24 in the pinout above)
pin number 20 (signal GND)
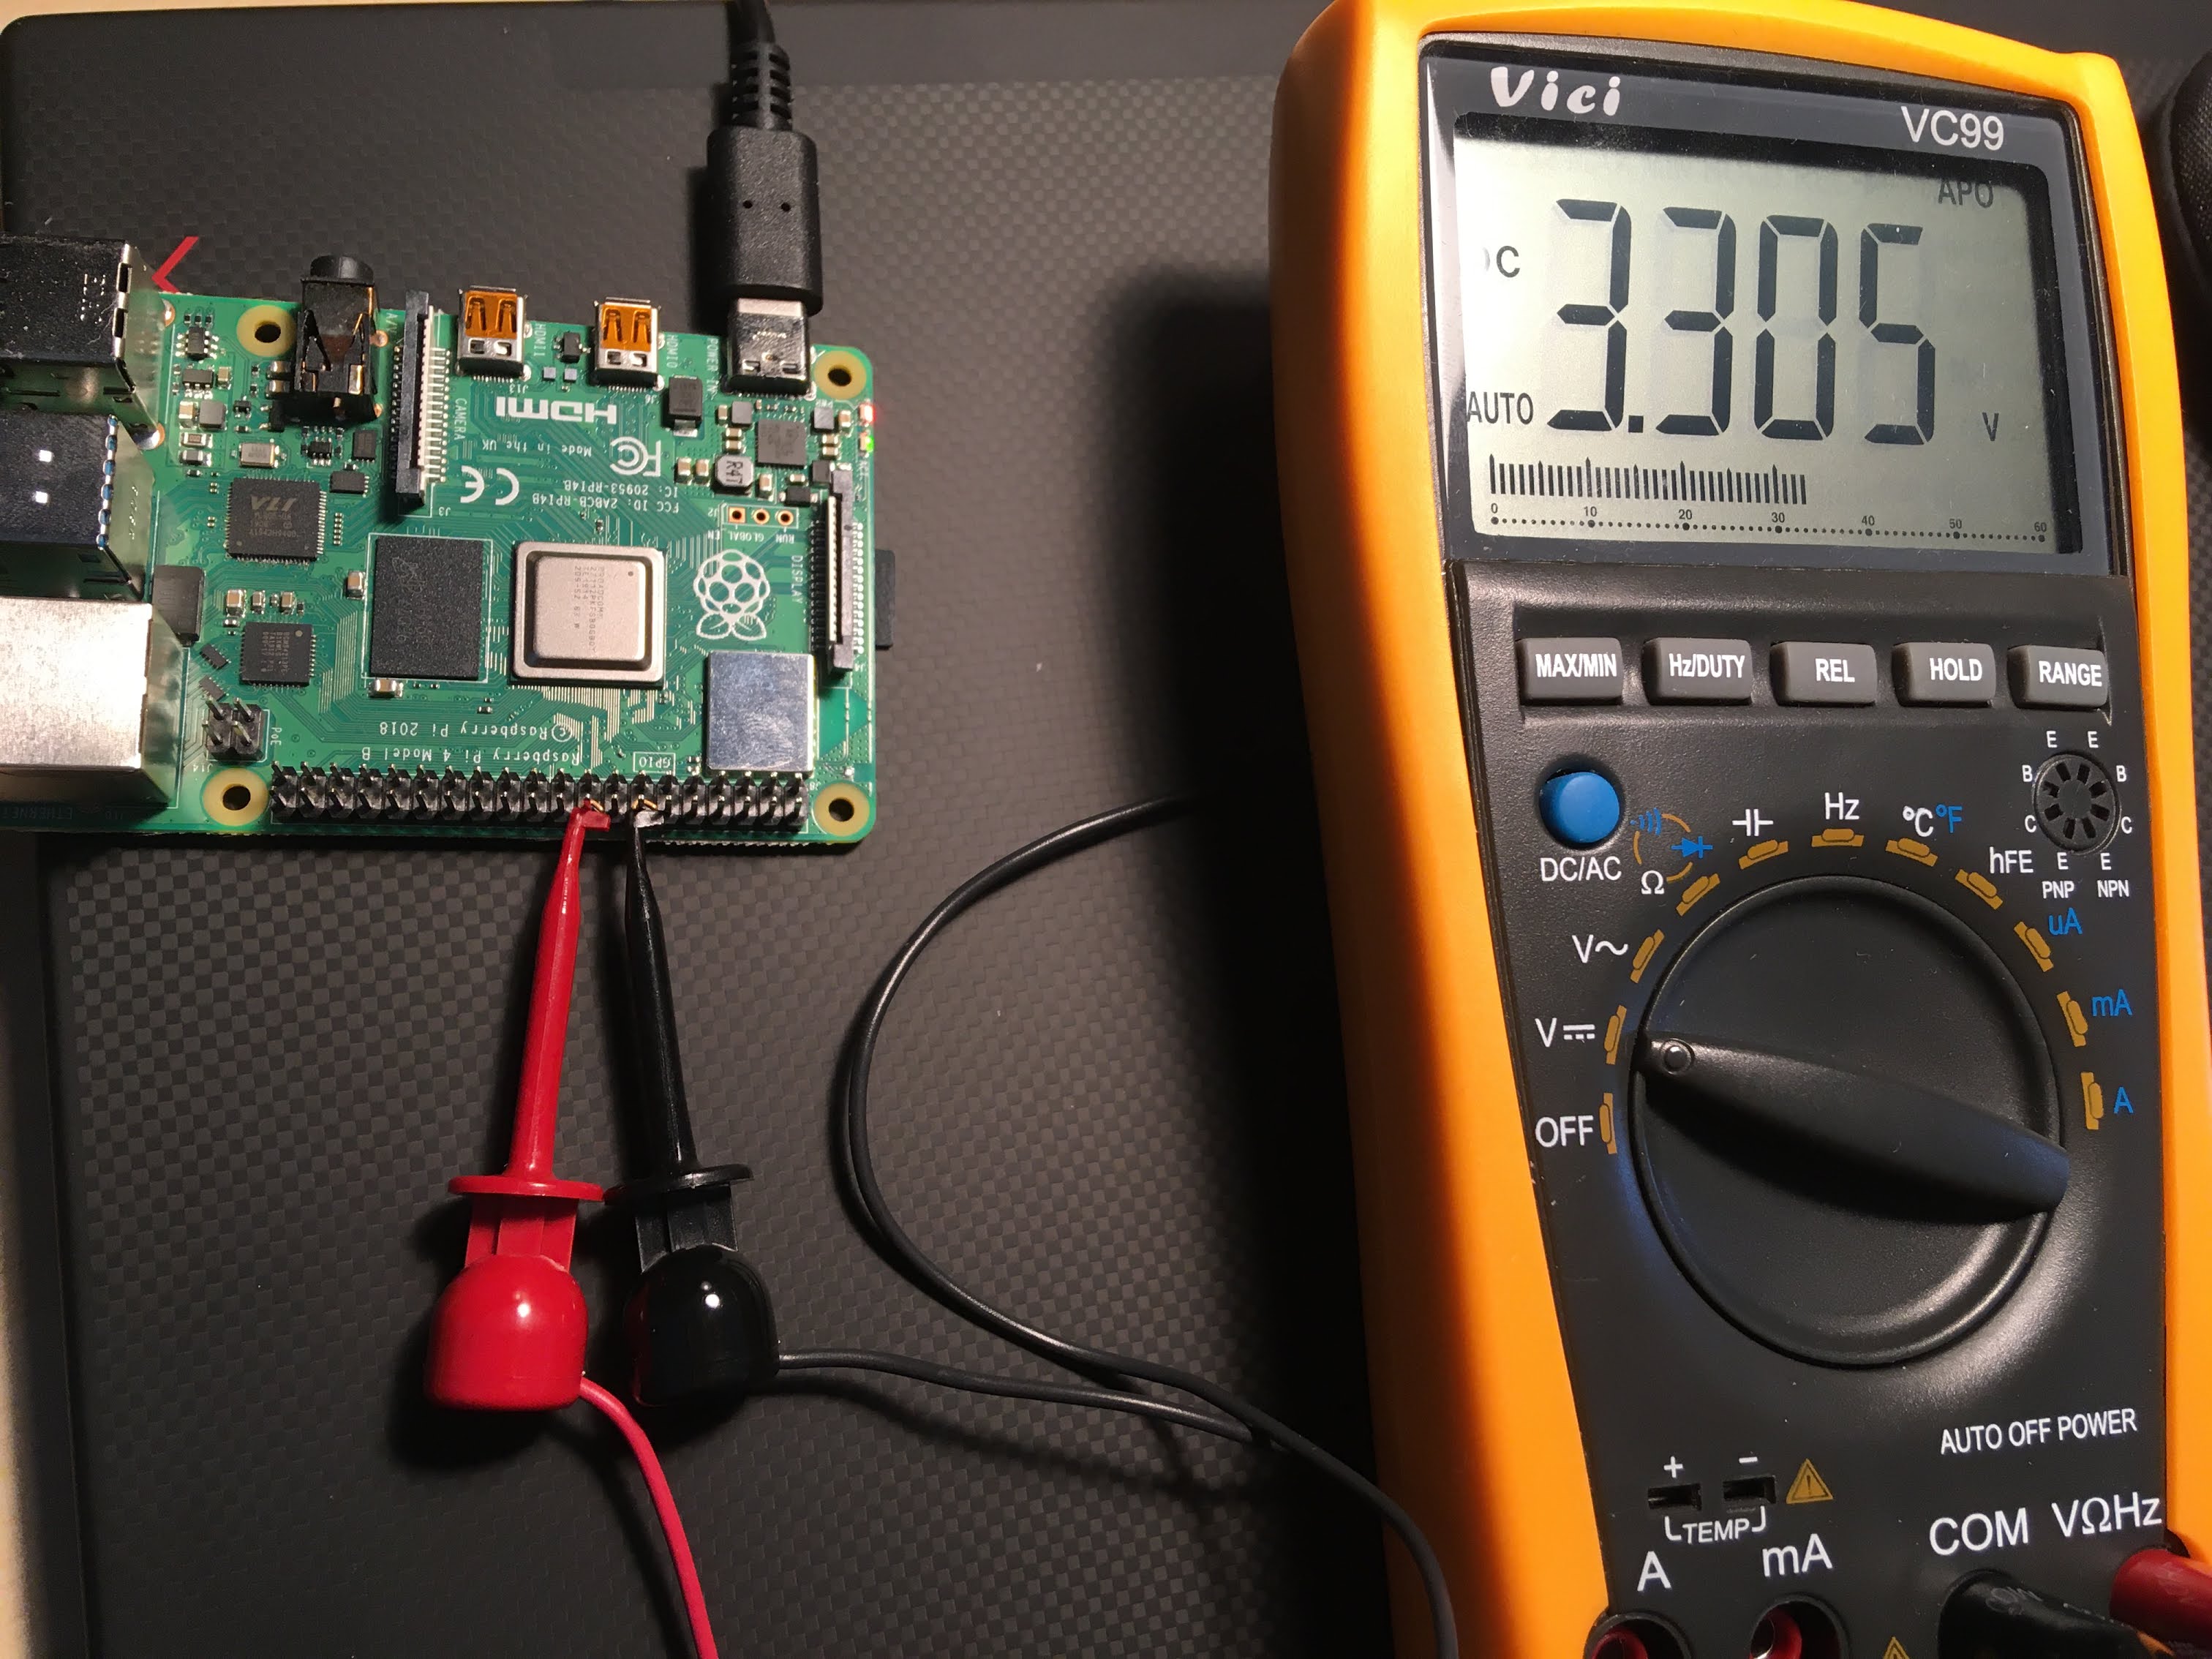
We need to set the multimeter to “Voltage measurement, DC (direct current)”.
Setting an output pin signal
To set the pin high and low, alternatingly, with a 5 second frequency, we will
be using the hello-gpio program, which is a slightly modified version of the
example at periph.io/device/led:
packagemainimport (
"log""time""periph.io/x/conn/v3/gpio"host"periph.io/x/host/v3""periph.io/x/host/v3/rpi")
funcdoGPIO() error {
log.Printf("Loading periph.io drivers")
// Load periph.io drivers:if_, err:=host.Init(); err!=nil {
returnerr }
log.Printf("Toggling GPIO forever")
t:=time.NewTicker(5*time.Second)
forl:=gpio.Low; ; l = !l {
log.Printf("setting GPIO pin number 18 (signal BCM24) to %v", l)
// Lookup a pin by its location on the board:iferr:=rpi.P1_18.Out(l); err!=nil {
returnerr }
<-t.C }
}
funcmain() {
iferr:=doGPIO(); err!=nil {
log.Fatal(err)
}
}
You have two options to run this program on your Raspberry Pi:
Use gok run to temporarily run this program on a running gokrazy instance.
Use gok add to permanently include this program in your gokrazy instance:
# From the hello-gpio directory, run:gok add .
# Then, deploy as usual:gok update
At this point, we should be able to see the high/low signal on the multimeter,
alternating between 3.3V (high) and 0V (low) every 5 seconds:
The below example configures a single Pin for Input and uses Go channels to
signal level changes that can be acted on. Keep in mind that shortening the
polling interval will increase CPU usage.
packagemainimport (
"log""time""periph.io/x/conn/v3/gpio""periph.io/x/conn/v3/gpio/gpioreg"host"periph.io/x/host/v3")
typepinLevelMessagestruct {
Stategpio.LevelResetgpio.Level}
funcsetupGPIOInput(pinNamestring, levelChanchanpinLevelMessage) (gpio.PinIO, error) {
log.Printf("Loading periph.io drivers")
if_, err:=host.Init(); err!=nil {
returnnil, err }
// Find Pin by namep:=gpioreg.ByName(pinName)
// Configure Pin for input, configure pull as needed// Edge mode is currently not supportediferr:=p.In(gpio.PullNoChange, gpio.NoEdge); err!=nil {
returnnil, err }
// Setup Input signallinggofunc() {
lastLevel:=p.Read()
// How often to poll levels, 100-150ms is fairly responsive unless// button presses are very fast.// Shortening the polling interval <100ms significantly increases// CPU load.forrangetime.Tick(100*time.Millisecond) {
currentLevel:=p.Read()
log.Printf("level: %v", currentLevel)
ifcurrentLevel!=lastLevel {
levelChan<-pinLevelMessage{State: currentLevel, Reset: !currentLevel}
lastLevel = currentLevel }
}
}()
returnp, nil}
funcmain() {
// Channel for communicating Pin levelslevelChan:= make(chanpinLevelMessage)
p, err:=setupGPIOInput("GPIO4", levelChan)
iferr!=nil {
log.Fatal(err)
}
// Main loop, act on level changesfor {
select {
casemsg:=<-levelChan:
ifmsg.State {
log.Printf("Pin %s is High, processing high state tasks", p.Name())
// Process high state tasks } elseifmsg.Reset {
log.Printf("Pin %s is Low, resetting to wait for high state", p.Name())
// Process resetting logic, if any }
default:
// Any other ongoing tasks }
}
}